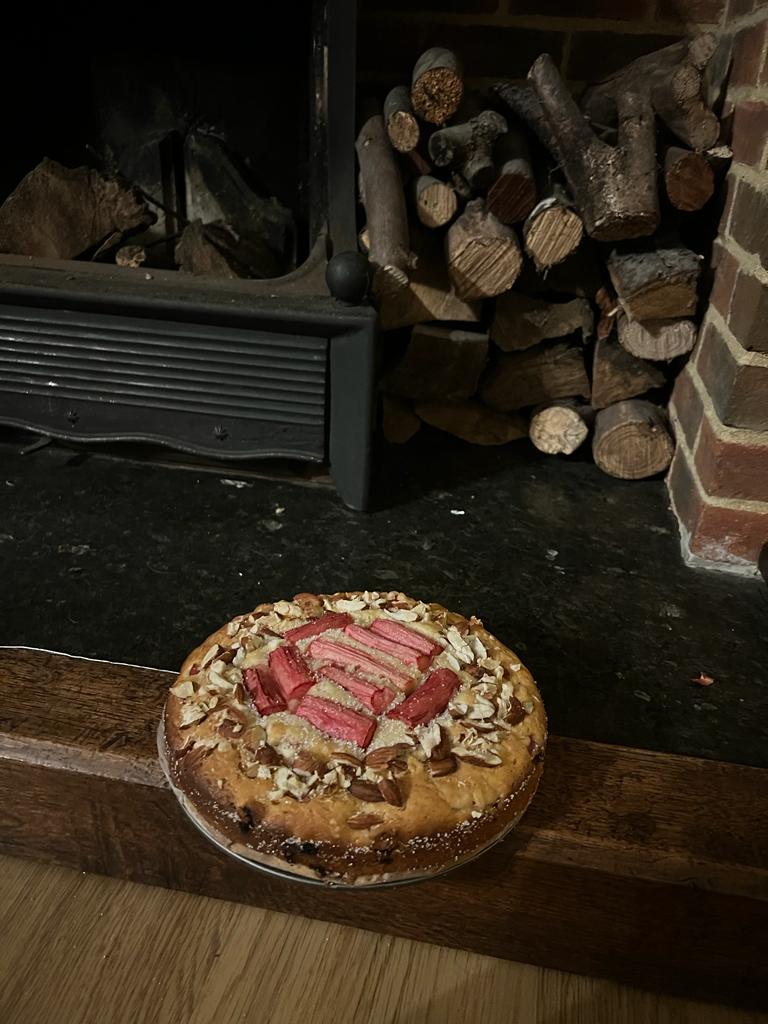
I am writing this from my couch, having taken a fair share of bites of this delectable and moist rhubarb and almond cake spiced with cardamom and subtly flavoured with vanilla extract. I love it. It reminds me of something, these flavours and the aroma. Does it smell like my kitchen after having made gulab jamun dunked in a syrup laced with cardamom? Or, does it smell like when I open a box of karachi biscuits? Or is it, the way the house smells when ma makes payasam on festivals? The slightly crusty edge along the top layer in all its toasted almond nuttiness with the vanilla and cardamom surely feels like a good day biscuit in flavour? The rhubarb is tarte and moist and blends so well with the cake. I have mixed some in the batter and some on top, like @florashedden did with hers. It is a brilliant method and I have only switched the hazelnuts for almonds, reduced the sugar, added in cardamom and done away with the sesame seeds. I halved it as well as am baking just for one. It has been a couple of years since I baked for one, especially with that one being myself. And this right here, on a sunday night, feels good and just the kind of high I need for the week.
Now, in my absolute desperation to nail what this reminds me of, I have eaten a generous portion of the cake. I can’t have the cake and know what it tastes like too, right?
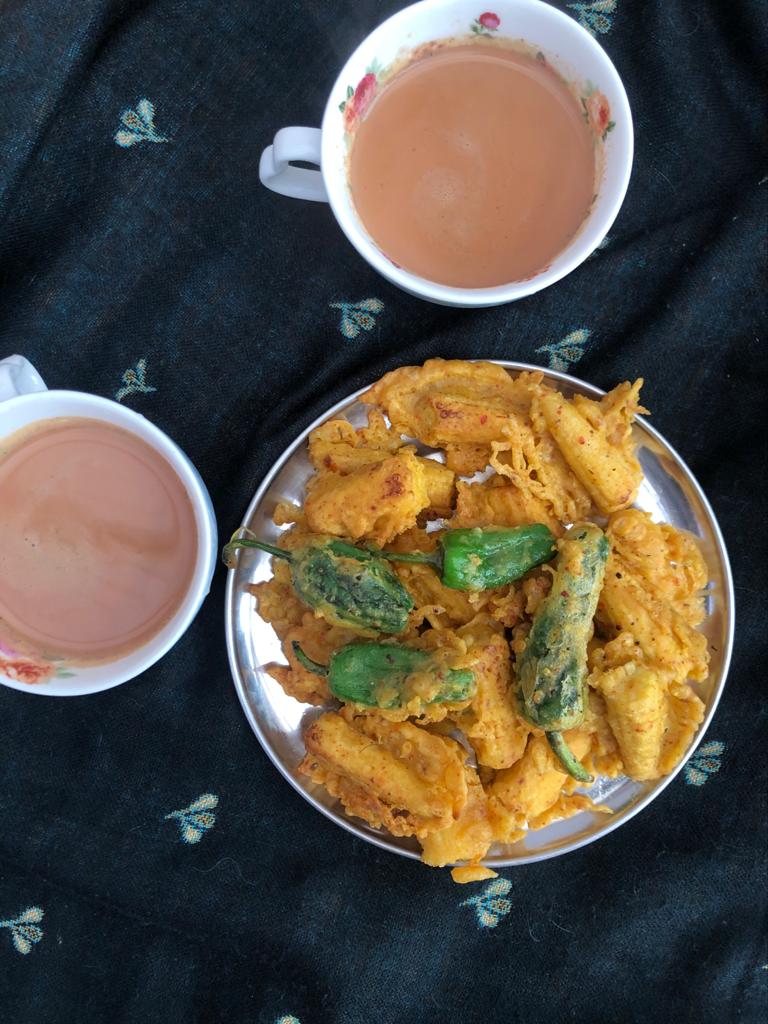
There is this lovely, almost hole-in-the-wall Goan restaurant in Hounslow called Casa de Goa that has been an absolute gem of a find. They have few vegetarian dishes but boy do they make them well! We sometimes pick up a side dish or two but I had been wanting to have breakfast there for so many months now and it finally happened. And I chose to make a beginning with the Goan style puri bhaji. It seemed the most exciting of vegetarian options offered to me and though I knew you cannot go wrong with a puri bhaji, I was a little skeptical of how different a Goan puri bhaji can be. Trust life to remind you to not judge and walk in with preconceived notions. This bhaji was different and splendid – it was a mix of Patal Bhaji made with dried peas soaked overnight in a paste of coconut and spices (I could smell and taste coriander and cumin and red chillies) and atop it was the Potato bhaji which also had a gravy consistency. I absolutely loved it. I am definitely going to try making this myself because God knows I can eat a couple of plates of this on a weekend. K ordered the ros omelette which is an omelette in a chicken xacuti curry served with pav and as tempting as it looked, I could not taste it but he loved his breakfast as well! The pav was just okay and not the kind of pav you would eat if in India.
The chai – what songs do I sing for the chai served in my favourite kind of glass? It was sweet and hot, just the kind of sip you want as you dip your poori in that hot gravy. It is so affordably priced and so easy to miss, it truly feels like a find. And you know what? It is, the kinds to keep.
Getting to the restaurant:
They don’t have the most updated website and calling them is your best bet. Website: https://casa-de-goa.business.site/?hl=en-GB Address: 113 High St, Hounslow TW3 1QT (they are located near Shri Krishna Vada Pav and opposite to Madras Flavours) Phone: 07808 197021 They do deliver through Ubereats, Just Eat and Deliveroo based on your location.
Being exposed to Odia cuisine through K opened up a new world of ingredients and methods to me. There were vegetables I didn’t know of, spices and pastes I had never tried, methods especially the diaspora of steamed dishes I took to really happily. It was also the first time I tasted and slowly developed an appreciation for mustard oil in cooking.
One ingredient that fascinated me most and still does is the use of pumpkin flowers/ blossoms. I now know that squash flowers are used in different cuisines but somehow the prospect of making a savoury snack with a flower and such a wonderful simple dish at that quite blew me away. I eat these fritters made with pumpkin blossoms called khakharu phula bhaja, every time I visit K’s place in Bhubaneswar. But this time, looking at all the zucchini blossoms I wanted to have a go at making it. We have a lot of squash blossoms coming up too and I must tell you that the success and ease of making them will only see us trying more.
On seeing the burgeoning blossoms on our row of zucchini plants, one of our friends who was visiting us commented how Italians make fritters from them. Off-late, I have also seen it being used in salads and pastas. It is amazing how flowers have found their way to our dining tables and feature in such an array of dishes and share similarities across continents.
One of my key hesitations with picking these flowers was if they would be interfering with the pollination and affect the plant’s productivity itself. After all, I was looking forward to pulling the zucchinis off with gay abandon. And then I did some reading and realised that the male flowers are produced in much higher numbers than needed so plucking a few should be okay. This was really all I needed and you know the rest of the story. I am so glad I made these because I love them – the batter coating that turns so crispy and the subtle flower encased in it as you blow your way through eating it hot off the pan. The joy of fried food is never lost on me, I really enjoy it – especially when I am frying them at home, when there is the goodness of all that fat without it being excessively drippy to the point of churning your stomach. I eat them to my heart’s and stomach’s content but I am quite particular that it is fried in good oil, and not re-fried if I can avoid it.
Here is how I made it (I have some videos of the process of this up on my Instagram):
You need:
Zucchini blossoms – say 6. Rice flour – About 3 table spoons (depends if you want to have a thick batter coating, I like mine just coated and not too much. If you like a dense coating, increase the flour keeping a 3:1 ratio of rice to chickpea flour) Chickpea flour – About 1 tablespoon Red chilli powder – 1 tsp/ to preference Cumin powder – 1 tsp Turmeric – a pinch Salt – to taste Neutral oil like sunflower to shallow fry – I use a spoon of oil for each blossom.
Method:
1. Clean the blossoms in water. Gently pat them dry with a paper towel. 2. Make a slurry of rice flour, chickpea flour, chilli powder, cumin powder, turmeric and salt. This should not be too thick or too runny. You want a consistency that you can immerse the flower in and when you take it out to fry, it should hold the batter. If you want a thick batter coating, make the slurry thicker so it hangs on to the blossom. 3. Take a small pan, bring to heat and add a table spoon of oil and bring to heat 4. Dip the zucchini blossom in the slurry (from 2) and fry it in the pan, flipping it and making sure it is done all through. I added some slurry as mine was thin. The extra slurry I added took the shape of the pan and cooked to a nice golden crisp around the edges. 5. That’s it really.
We enjoyed ours with some zucchini pasta 🙂
Some other ideas to try: You can add garlic paste to the slurry. I don’t do it. You can add finely chopped green chillies or make a paste of green chillies and garlic and add it to the slurry too. That would taste really nice and as I type this, I am tempted to try it myself. You could make this with blossoms of pumpkins, zucchinis and quite a few squashes. I have only had pumpkin and zucchini ones.
I did not eat a Bombay sandwich when I was in Bombay years ago. Is it just called a sandwich there? (laughs at own “joke”). I am not surprised though – I have not eaten a lot of *obviously-you-should-have-tried-that-when-you-were-at-X* dishes. I took my time appreciating regional cuisines and food in general. Now, it is the top web search I run when we travel. Travel? Okay, I hear you laugh – it has been a while since we travelled, but you know what I mean.
Having eaten this first time last year, I have often asked myself “How could I have not made a Bombay sandwich before?” I think it is my general disdain towards potatoes on most days (except in fries, of course). Now I have a deep love for bread in all its variety and it forms part of at least one meal almost everyday. Use white or brown, wholemeal or seeded, but do make this. Add beets if you fancy, or don’t, but make this. Make it yours.
This is K’s recipe and my execution and even though I assume you don’t need another recipe for a sandwich, I will go ahead and tell you anyway because I really liked it.
A cheese version
All you need to do:
Take a slice of bread with the crust/ borders removed (keep them aside to make crumbs or fry them and use in soups)
Make a chutney of corriander- mint – green chillies- tamarind – black salt
Slather a nice layer of that coriander mint chutney on one side of each bread slice.
Delicately layer some boiled and sliced potatoes, slices of tomato, onion + sprinkle a bit of black salt + a slice of cheese if you like and cover with another slice of bread with chutney on the inside.
Now slather (there is a lot of slathering, I know) the top of the bread slice with butter and heat some butter on a pan and toast this to a nice golden with butter on both sides.
A no cheese version I made a couple of days ago
I can understand if you feel an uncontrollable urge to eat this right off the pan, hot, gooey and fragrant. In fact, I would highly recommend you to. Unbeknownst to you, it may be just what you need.
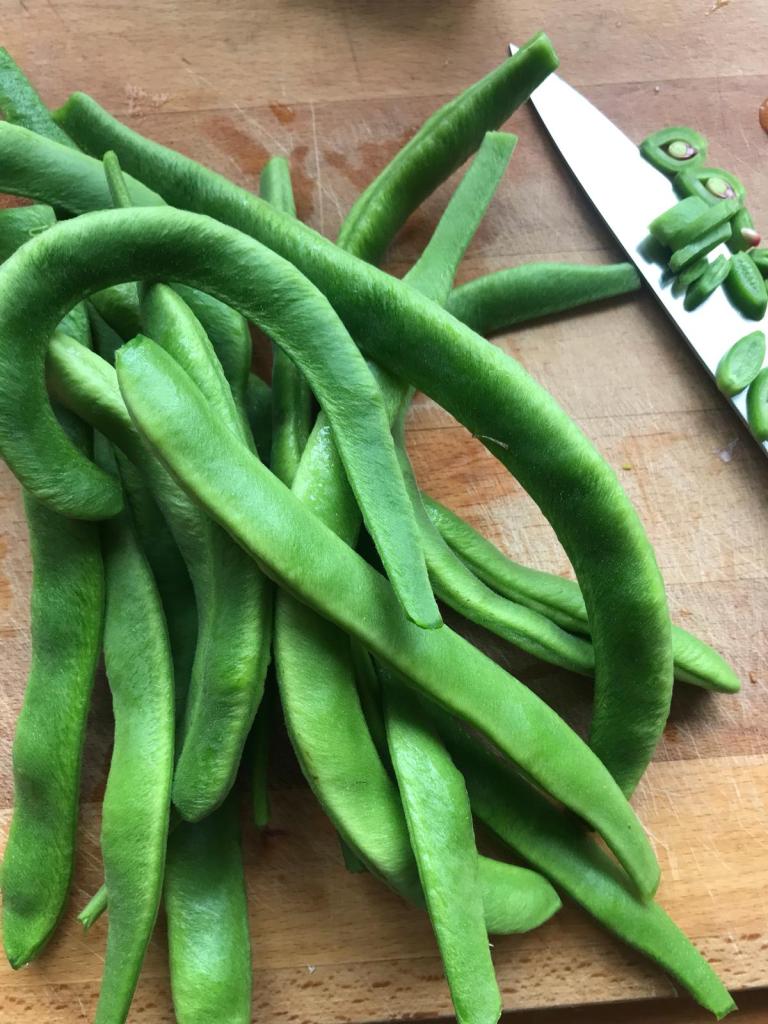
For a long time now, I have tried to grasp the meaning of simple food. You see this plate here ? Rice, tomato rasam, a roast pappad, some palya which by the way is what I made of some of those gorgeous runner beans that our neighbours gave us – this meal is my meal, it is the kind of meal I grew up eating and it was a full meal. I don’t ever remember thinking of this as a simple meal as much as I thought of it as a staple. On the other hand, simple has a sort of a happy connotation to it too bringing up associations with what we now deem to be simpler times. Is today a simpler time of tomorrow? Which kind of leaves me in a dilemna – all the subjectivity around simple apart, what is a simple meal to me, today? Is it my everyday meal? Or a meal that comes together simply? Perhaps a meal with few easily available ingredients? Or is it a meal one can make sustainably, consistently?
But here is what I chose to do as this plate stared at me – dive into my rasam rice with gusto. It did not answer my question. But when the smell of the ghee tempering invades your kitchen, it is best to keep matters simple and enjoy the meal. Simply put, it is as simple as that. But I’d love to know – what is a simple meal to you? Can you define it?
If you are curious, here is how I made this meal.
Runner beans Palya
Our lovely neighbours Da and Ce gave us some of the best runner beans we have had – tender, crisp and absolutely delicious with all the added happiness of having been grown with tonnes of love. Have you even seen the smile that lights up Da’s face as he talks about his love for runner beans?
You need: Runner beans – about 300-400 gm Fresh/ desiccate coconut (fresh is amazing, I used desiccate as that is what I had) – 2 table spoons (or to your liking) Tempering ingredients: 1 tablespoon oil (sunflower or coconut), 1 teaspoon mustard, 1 tsp cumin, a pinch of asafoetida, a couple of dried red chillies torn into rough bits, half a tsp of methi/ fenugreek seeds, 1 tsp urad dal/ channa dal or a mix of both, curry leaves. Turmeric – a pinch. Salt to taste
Method: 1. Chop the runner beans small. 2. Take a wok/ kaDai and bring to heat. Meanwhile keep the tempering ingredients ready. 3. Once hot, add a tablespoon of oil (I used sunflower but coconut oil works great too!) add the mustard, cumin, fenugreek and let them splutter, add the chillies, asafoetida and the curry leaves and sauce for 5-10 seconds. You don’t want to burn them 🙂 4. Add the chopped runner beans, turmeric and give it a good toss, add a bit of salt (to hasten cooking and for the beans to get some of it in) and sprinkle some water, give it a mix and cook on medium heat. You can cook this covered too but just keep checking in between. 5. Once the beans has cooked to a bite (we definitely don’t need them to become mushy!), adjust salt to taste, add the coconut and mix well. Turn off the heat. Your palya is ready!
Quick Tomato Rasam
This has to be one of the easiest ways to make a quick rasam. Ofcourse, this calls for having rasam powder or sambhar powder at hand but it comes together so quickly, so I highly urge you to have some in your pantry. I use the one that ma makes and gives me every time I visit her but you can always use good quality commercially available ones from MTR or GRB or a brand you like. Ofcourse one can go on about the joy of using a powder that is handmade but some of the commercial mixes are not that bad and while it may make a difference in the taste, I still believe that a rasam made with a good quality store-bought rasam mix can still be comforting 🙂 I will never forget the copious amounts of rasam we had during the brief but heavy snowfall that 2020 brought with it here in Surrey. See for yourself.
You need: Tomatoes (preferably sour): 300-400 gms chopped into small chunks Tamarind paste or tamarind water from pulp (skip if your tomatoes are super sour, mine were not so I used tamarind for tanginess): to your preference. I used 2-3 tsp of paste, we do like it quite tangy. Tempering ingredients: 2 tablespoons ghee, 1 teaspoon mustard, 1 tsp cumin, a pinch of asafoetida, a couple of dried red chillies torn into rough bits, curry leaves torn. Corriander leaves torn to small bits – to your preference but highly recommend keeping the stalks. Rasam powder/ molaga poDi/ sambhar poDi – 2 tablespoons (this depends on how spicy you want it to be and the powder you are using ofcourse, use your discretion :)) Salt to taste Water – 2 cups
Method: 1. Heat a deep bottomed vessel. 2. We start with the tempering so add ghee, let it melt and heat up. Then, add mustard, cumin and once they have spluttered, add the torn red chillies, asafoetida and curry leaves. Sauté for a few seconds. 3. Now add the tomatoes and sauce for 3-4 minutes. Let us become slightly soft but not too mushy. 4. Now, add water, tamarind paste and mix well. Bring this to a rolling boil. Once the tomatoes get cooked and the raw smell of the tamarind paste is no longer present, then add the rasam powder/ molaga poDi/ sambhar poDi and keep on boil for 3-4 minutes. 5. Now, add salt to taste and let it simmer for a couple of minutes. 6. Finally, add the torn coriander leaves and stalk, mix well and bring off heat. Your rasam is ready!
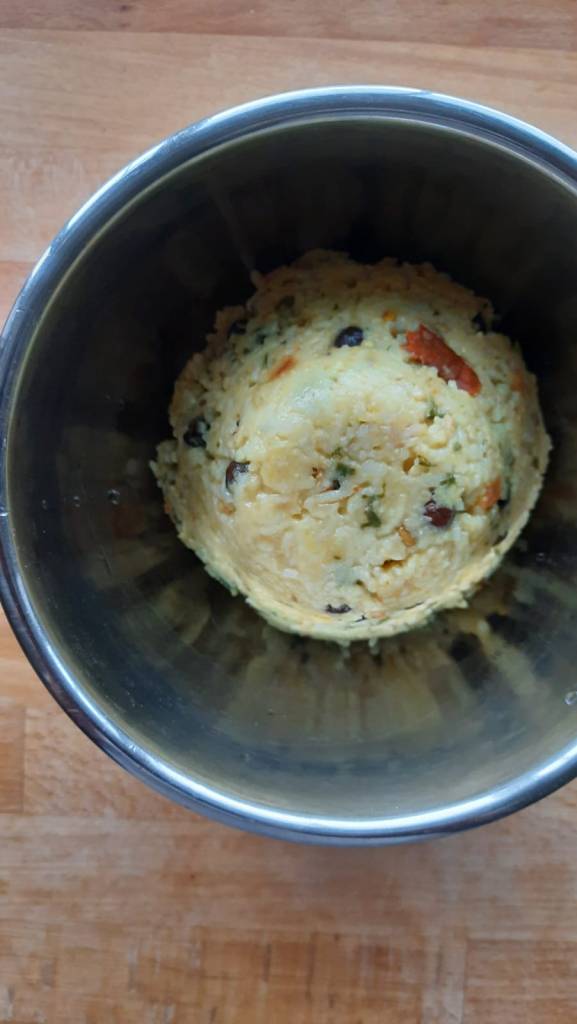
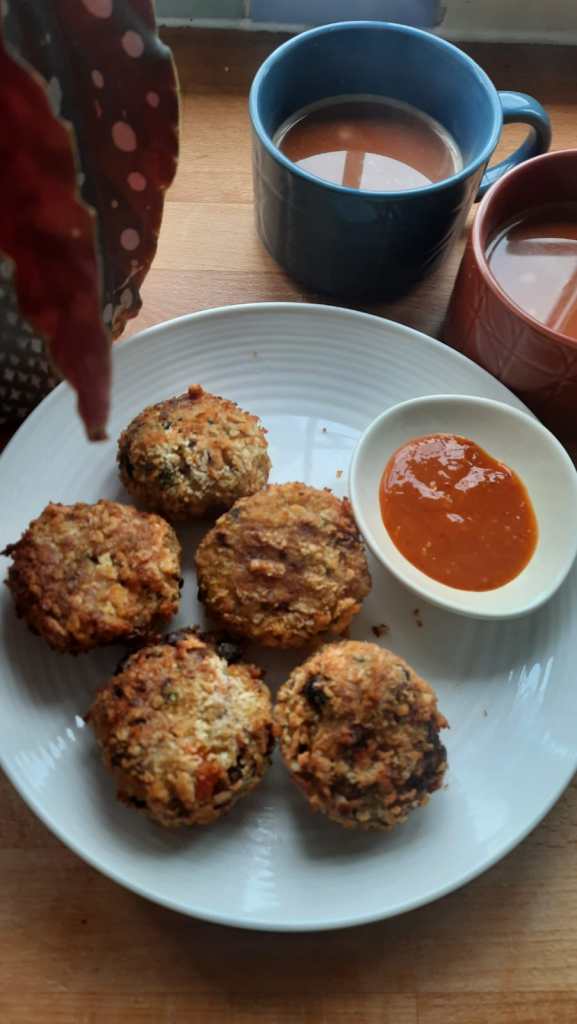
I must start by saying this – we are khichDi lovers here. While I can do with an extremely simple moong dal khichDi sans any vegetables, K loves it when it has some potatoes, chole and garlic. But one thing we always agree on is hot, slightly soupy khichDi that we can devour by bowlfuls regardless of what meal it is.
But here is the thing – when you cook in a famished state, even your poor sense of proportion takes a further hitting which is how I ended up making an entire pot full of khichDi that lasted two servings each for dinner, a serving for breakfast and another generous bowl smirked at us as if daring us to finish it. Now, we are not ones to give up or throw away perfectly normal food (and definitely never khichDi), so this is something I am so proud to have made – a perfectly healthy air-fried khichDi cutlet if you can call it that! I cannot urge you more except to share how I made it and sincerely hope you make some extra khichDi or give this a go when you make something with the consistency of a khichDi like pongal and have leftovers. They sort of remind me of one of my favourite Italian snacks – arancini. Please treat this more as a method/ idea than a recipe to follow to the T.
Here is what you need:
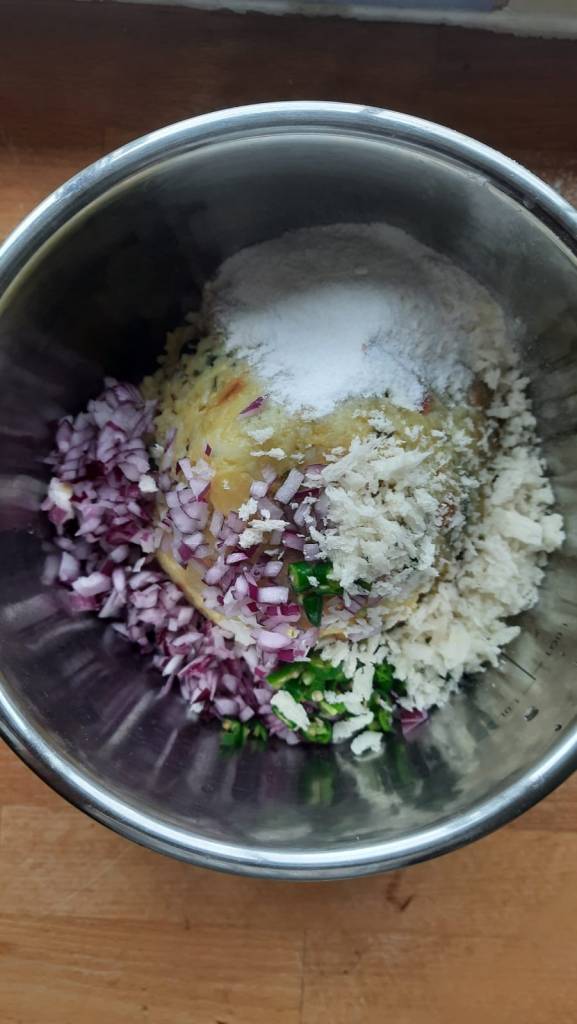
Leftover khichDi – I suggest you keep it in the fridge to let it thicken (if it was soupy to start with and you probably would if they are leftovers anyway) Finely chopped onions (optional) Finely chopped green chillies (optional and to taste) Rice flour – About 1.5 tablespoon (just to make sure your khichDi can come together like a ball and also crisp nicely). Panko bread crumbs – 1 spoon to mix in the khichDi (again for crispiness) and enough to coat the khichDi balls with it. You could perhaps replace with java/semolina/ suji but I have not tried this. Cheese of choice, I used cheddar – cut into small thin strips to place in the centre of the khichDi ball
Method:
Take the khichDi out from the fridge and ideally you want it to be slightly clumpy but if not, we can always add more rice flour in the next step.
2. Now add finely chopped onions, green chillies, rice flour and panko bread crumbs.
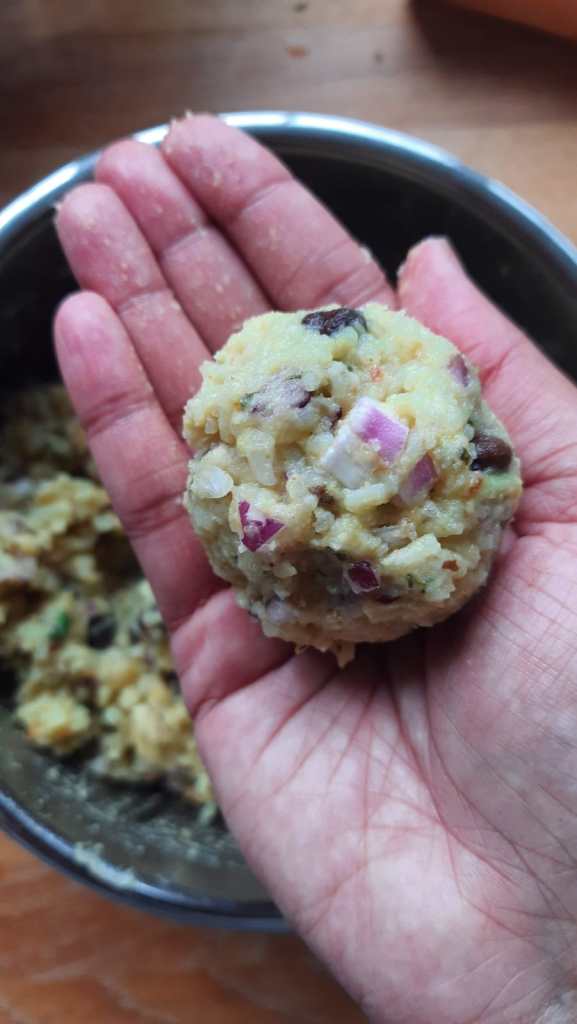
3. Mix it all together and make a ball with it. Add more rice flour if needed so it comes together. It will be a bit sticky and that it totally fine.
4. Make a small dent in the ball and stuff it with a cheese bit and close it.
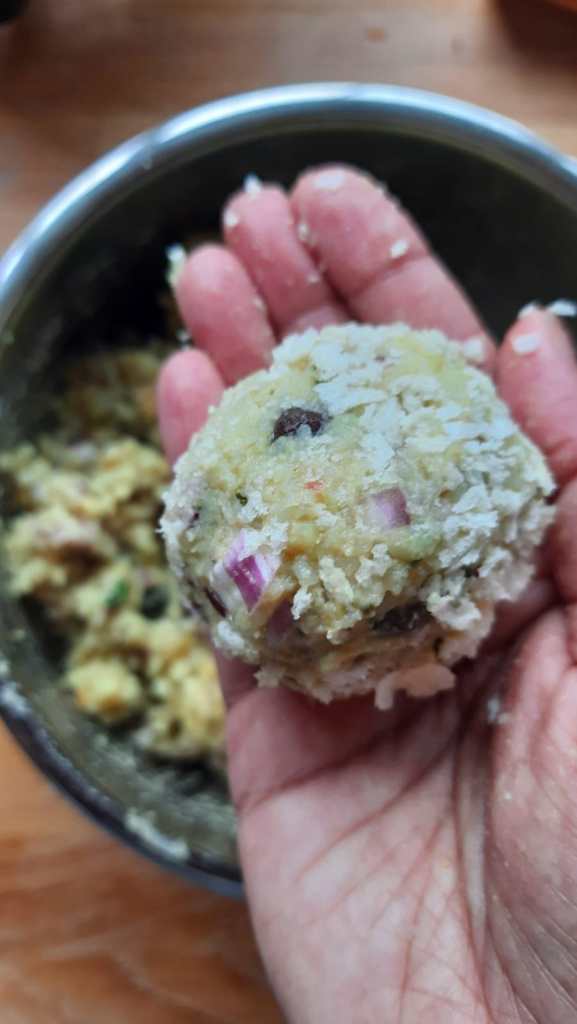
5. Roll this in some bread crumbs to coat it.
6. Roll them all into balls like above.
7. Now place them in the air fryer. Brush it with a little oil (but this is not necessary as the balls crisp regardless from how I have tested them). I used Ninja food that has an air crisp function. But any air fryer will do. Set the temperature to 200C and crisp it in 10 minute increments. Check every 10 mins, turning it over. Mine took 25 minutes. If you have made smaller balls they need lesser time, this is something you will know based on your air fryer.
8. That’s all! Serve these gooey centred khichDi cutlets with piping hot chai. We had ours with the absolutely delicious masala chai that K makes.
I have a little video on instagram walking you through the process with the reveal of the crunch and everything!
Other ideas/notes: 1. You can make this with pongal or similar pressure-cooked mixed rice recipes that hold together. 2. Add more veggies, nuts, shredded cheese or stuff with paneer – just anything you like! 3. Coat it with sesame seeds for that flavour or roll it with rava/semolina/ suji for that crispiness instead of bread crumbs.
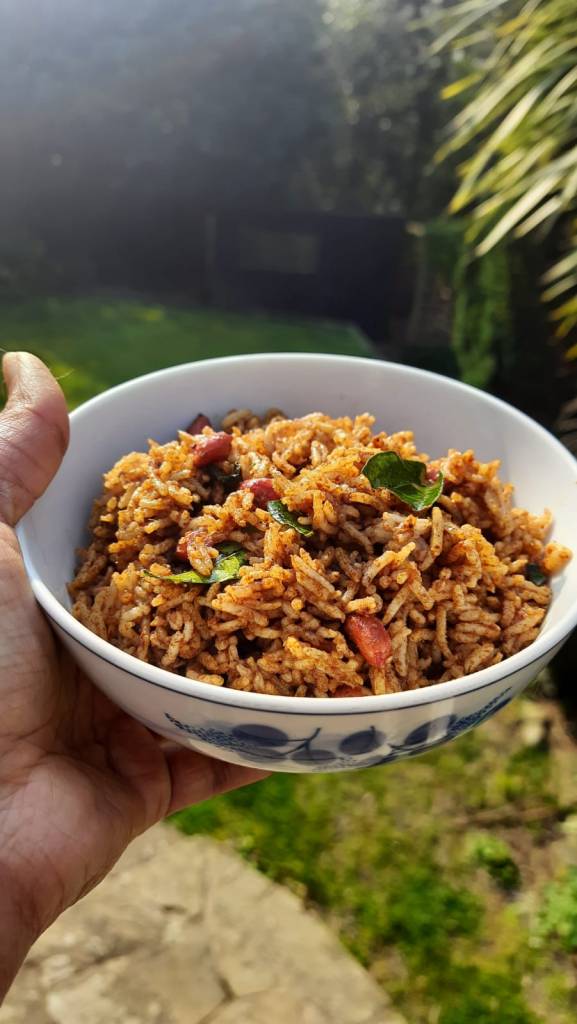
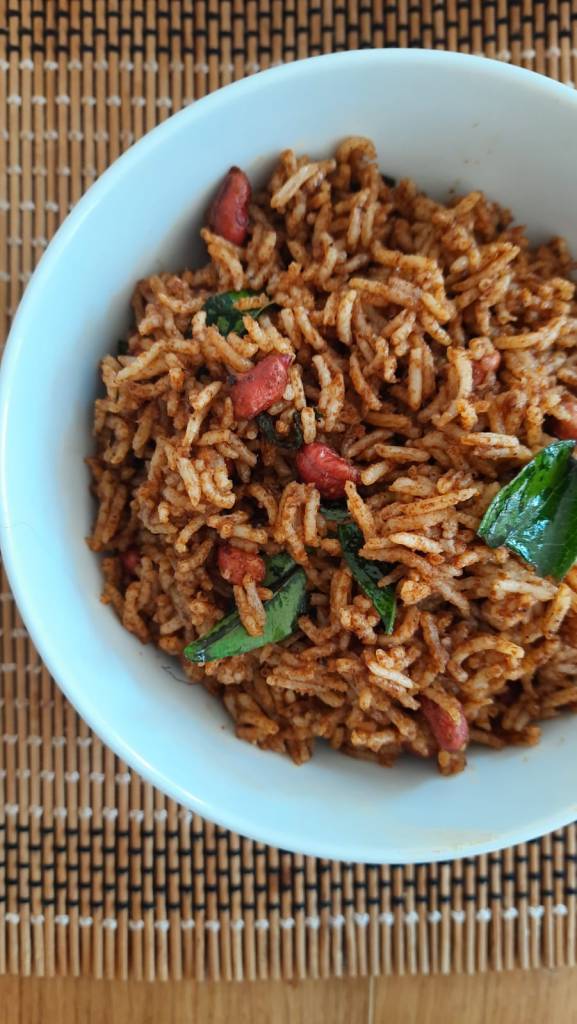
As if there are not enough reminders of how long it has been since my last meal in Mysore home, ma’s puLiyogre gojju/puLikaachal is now teetering between dangerously low and tearful levels. I am very good at making things last until my next trip back home usually but who am I kidding? The pandemic has thrown any semblance of such pride in the air. And am not over reacting. I can learn to make this myself and try to recreate ma’s presence like I do with a lot of my cooking but I refuse to. Not this time. Those dabbas of poDi and uppinkai and thokku and gojjus that I carry from home after my father carefully double and triple packs them and meticulously weighs them so I never have to suffer at the airport are my way of having ma in the kitchen, in those jars with their lids tightly shut only to be embraced every now and then, preciously, deliberately and very very conscientiously. There is a lot of love that goes into them, there is a lot of excitement in making them and a lot of satisfaction in them being being used to make a meal. Objectively speaking, making a great gojju or pickle is not something only mothers can do and yet to me, they are unparalleled. Colour me sentimental and overcome by an extreme longing for home, but what is my food without it?
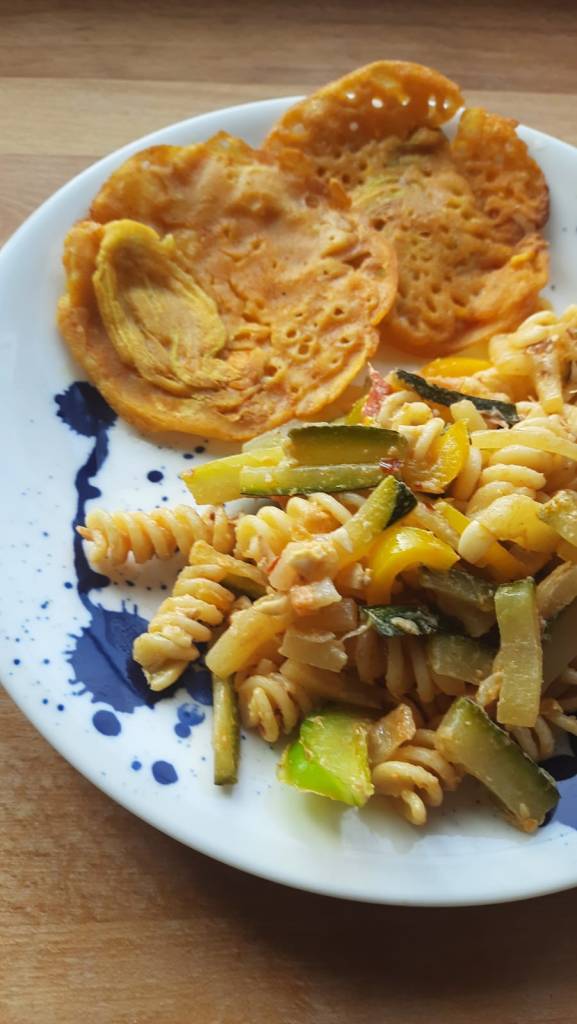
One of the evenings not too long ago, I made a chilli with chauLi (black eyes peas). I have made chilli with different beans before and I feel like this is one of the most versatile dishes that cannot go wrong for that very reason because all you need to do is add everything you like and enjoy, in desired amounts. And it comes together in one pot if you have boiled/prepped your beans/lentil before. I used black eyed peas, onions, red bell pepper, peeled plum tomatoes from a can, soya chunks, green beans, spring onion and garlic. I used some Italian herb seasoning but you can play with veggies, lentils and seasoning of your choice. A quick simple that is healthy and very easy to put together.
Before I go on to share how I made it, can I just tell you how it blows me away when the ingredients, everyday, common, unassuming ingredients, come together to form a magical dish? Sometimes, I have no memory associated with it, it is not anything I have eaten before and yet it feels so comfortingly familiar. I love that about food, its ability to take you to a warm comforting spot. While I really want to share the method, I must warn you. My cooking is largely (largely but not completely) driven by mood, instinct and sensorial experience that the moment offers as I temper, sauté, fry, roast, grill, bake.. While I do follow some techniques and measurements while needed, curry is probably the last place where I am exact. So, please treat this as an idea and make it yours.
I used: Soya chunks (soaked in hot water and softened) Vegetables: Spring onion (separate the white bulb from the green part), minced garlic, chopped – onions, green chillies, tomatoes (I used canned but feel free to replace with free ones), fresh corriander Spices: Turmeric and chilli powder Herbs: Dried parsley, dried basil and dried oregano Any neutral oil for tempering Salt to taste
Here is how I made it: In a deep bottomed pan, I heated a couple tsp of oil. Once the oil was hot, I sautéed white tips of spring onion and chopped onions until translucent and garlic until the raw smell was gone. I added chopped green beans and red bell peppers and sautéed for a couple of minutes. I then added peeled plum tomatoes from a can (I like canned tomatoes and that soupy goodness in this though I have used fresh tomatoes too). I also added a pinch of turmeric, chilli powder and let it simmer for 10 mins in its own sauce. After this, I added a tsp of dried oregano, dried basil, parsley, salt and some soya chunks and some water let it simmer for a further 15-20 minutes finishing off with chopped corriander, the green bits of the spring onion and a squeeze of lemon.
We enjoyed it with toasted slices of baguette, but this would taste on its own too or possibly as a pasta sauce. The possibilities can be endless and as your heart fancies!
I love how seasons speak to my soul through my taste buds and of course gut. I never knew growing up, that I would remember food and associate it with a lot of happy memories years on. But turns out, I very very happily do. For someone coming from a place that boasted of moderate weather through the year (well, the summers have gotten hotter now) seasons trigger a lot of special and specific memories. And of course, the availability of seasonal produce had a big role to play and I fondly remember how seasons primed cravings and continue to do so, as I write this.
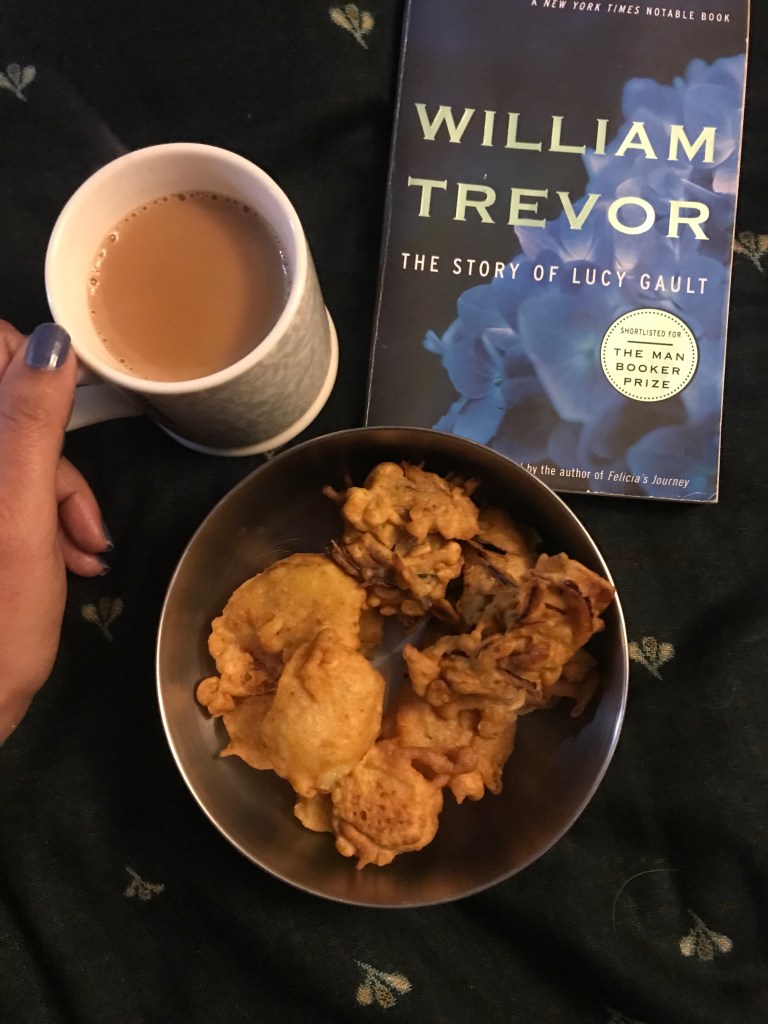
Having moved to UK, I have fallen in love with autumn and winter. It is every bit as beautiful and picturesque as I had imagined. What compounds this love is my love for the food that winters are made of – warm, comforting to the point that a dish regarded as an indulgence or sometimes even not the healthiest for your diet, becomes comfort food. I am talking about the pakodas, samosas and their clan, ofcourse. The last couple of months have seen a fair share of snacks and chaats and we had the perfect excuse for it – the weather. Growing up, we did not eat a lot of fried food at home. The amboDes, bajjis and pakoDas were occasional and immensely appreciated when they did happen. But we always had easy access to fresh puffs and aloo buns from the local bakery and our evergreen and ever favourite Ragavendra bakery in the city that makes puffs and rusks like no other.
But I always remember tamaashi bajji. Literally translates to “fun bajji” but when pa says it, he probably means “special bajji”. I have never asked. When ma made onion and potato bajjis (fritters for lack of a better word), some bajjis would have potato slice and some onions in them instead of being exclusively either. So we’d happily start eating one of them thinking it is an onion bajji but a potato would surprise us! And these were far and few but they were there surely in each of our bowls and would have us squeal in excitement when we found one. I make these tamaashi bajjis for K and myself sometimes. I realize now that they are as tamaashi making and sneaking into a loved one’s bowl as much as finding in mine. Pa has nailed it as usual, of course. Crispy along the edges and soft inside, these disappear by bowl-fuls. The perfect accompaniment to all this has to be the ginger-cardamom chai that K makes so so well. We make a big pot of tea and help ourselves every now and then. The bajjis moved us to a state of calm and snuggly and only whetted our appetite and souls for more.
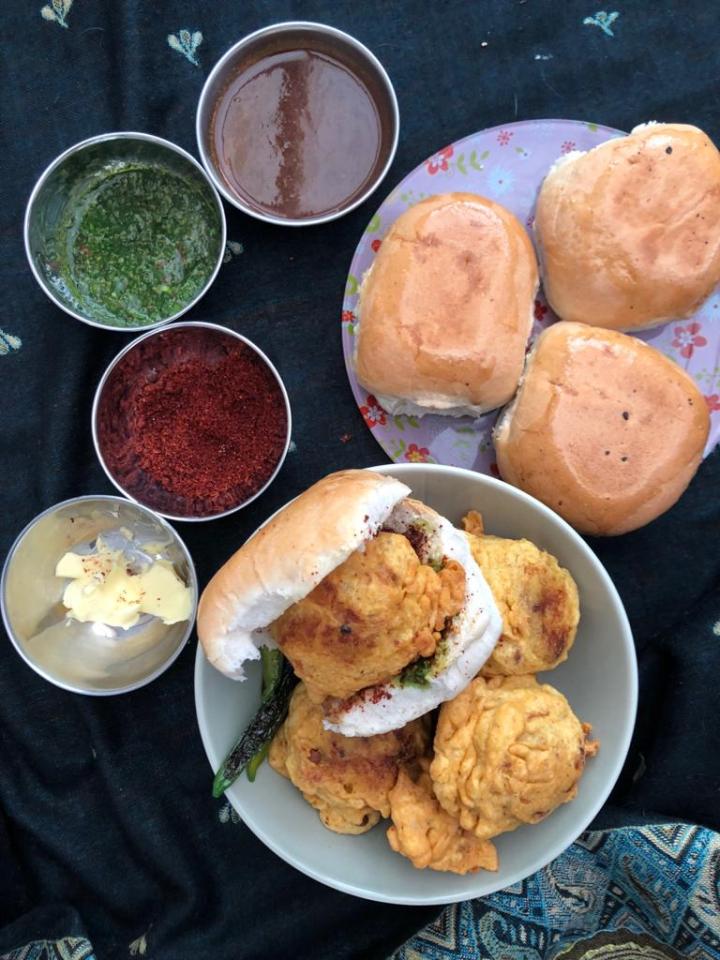
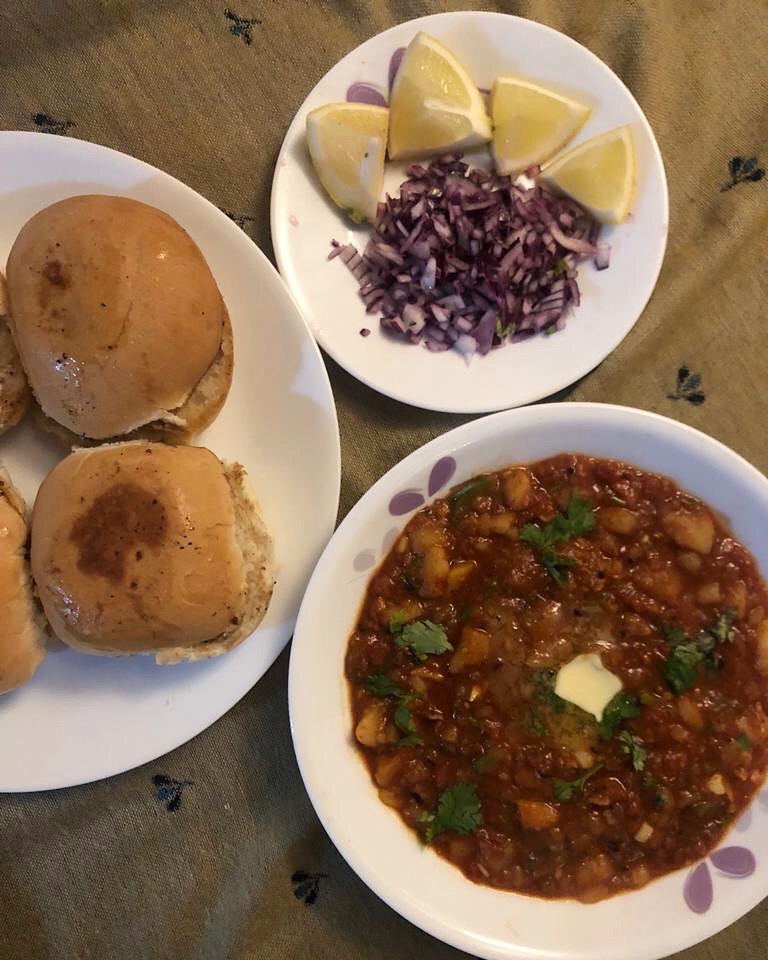
I must admit that the vaDa pav is not a winter comfort alone, at ours. We eat them almost every fortnight. We have a favourite little restaurant in Hounslow called Shree Krishna VaDa Pav that makes them so well that we drive all the way there because it is just so incredibly worth it. With storm Dennis and incessant rains, our plans to head out for vaDa pav went kaput. So I decided to make them from scratch at home, the vaDas and the chutneys I mean. The pavs came from Morrisons. The chutneys are the heart of the vaDa pav, to me. I need all of them to have a full-fledged experience. Haha I am serious. The sweet and tangy imli (tamarind) chutney, the green corriander chutney, the chilli- garlic powder that is bomb-diggidy and of course the butter. As I blend the coriander chutney in the blender, with the tamarind chutney simmering away on the stove-top and the potatoes cooling down in the pressure cooker, K makes a vaDa pav playlist (extremely soulful Bengali music) as his tea masala in the mortar and pestle makes the environment heady. This is how I remember the makings of vaDa pav from that day. Ofcourse, it helps that K called them “so fantastic” in between a big bite because who doesn’t enjoy making loved ones happy?
Vada Pav
When you have pavs at home, the only logical next step after you have had your share of vaDa pav is pav bhaji. This is so simple and versatile to make with vegetables at hand though potato is a must. So ofcourse, it happened. I started making pav bhaji a few years ago but I can see I have come quite far with this one which is funny because like I said, it is not that hard to make. I admit I make small changes that my heart fancies but I wonder if those little changes have helped or if I have grown to like what I make. All questions don’t need to be answered so I shall let it be.
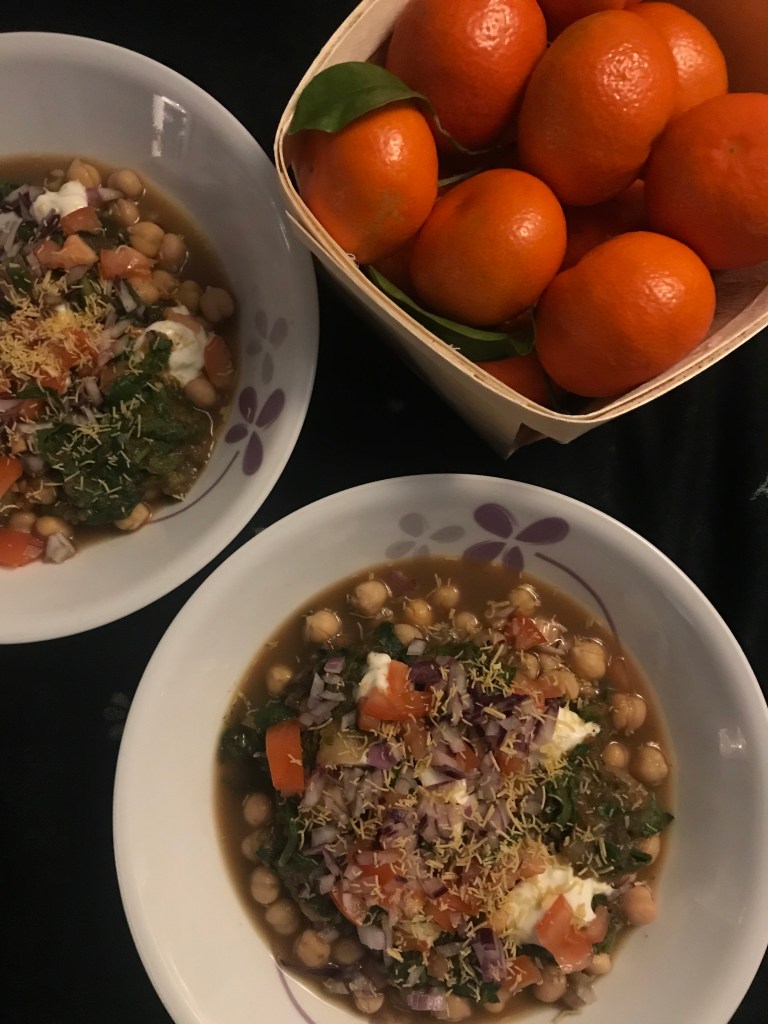
Somewhere along an extremely easy peasy chole chaat with onion-corriander leaves- cumin seeds-tamarind paste masala topped with Greek yoghurt, chopped onion, tomatoes and nylon sev happened. This is sort of my go-to for a chaat craving. It comes together in a jiffy and the minute I garnish it with finely chopped onions, fresh corriander and yoghurt, I know I want it.
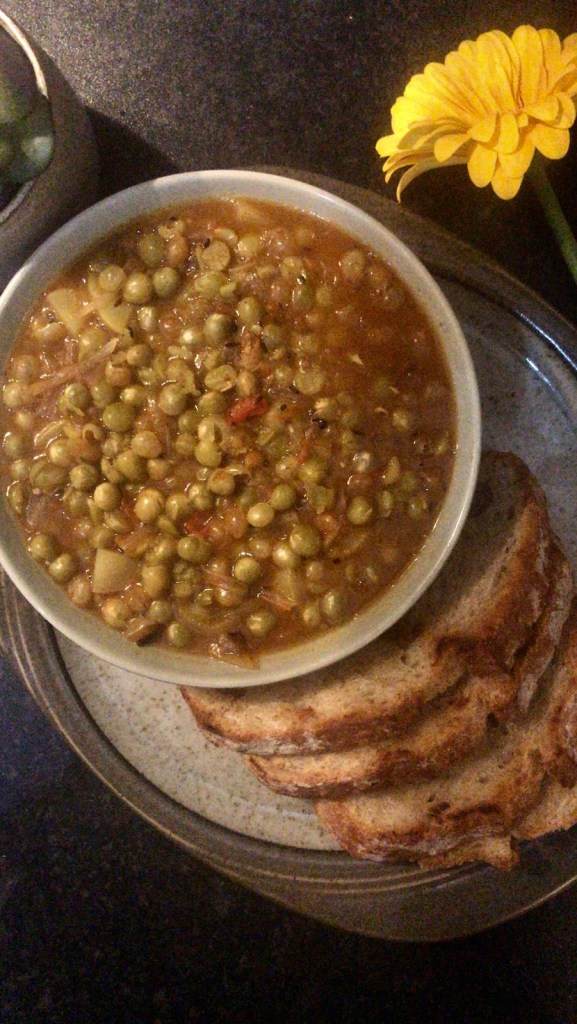
You have to forgive me for grainy, badly lit pictures as I click hurriedly under the exhaust light trying to stand as far as I can to avoid a shadow. I do have a quiver of excuses about short daylight, extreme hunger, impatience, a phone that had absolutely zero storage (a dropbox activity that I have procrastinated for long and hence this day has creeped up on me again) that makes me take shots on instagram and do poorly edits before posting and yada yada but underneath them all has been my laziness to change some of that. So even though the picture of the ghughni (dried peas cooked in a gravy) is grainy, the experience is crystal clear in my mind – piping hot spicy ghughni with buttered and toasted sourdough (feel free to butter them again) in a dimly lit conservatory as we ate in silence with little nods and sighs of satisfaction – bliss.
It was on one of the drizzly evenings we decided to bring a dhaba home. We often think of these roadside restaurants often along highways in India serving some fantastic local fare both meals and snacks that sometimes make journeys that much more enjoyable. Even now, every time we go on long drives, I look forward to the pit stops. So I made these pakoras with marinated baby corn and fried some poblano peppers and they were so perfect for the time and place we were in.
The comfort and joy of making dishes from scratch is unparalleled especially when you are in the mood for it. These samosas stand testimony to that. These take a bit of time but it is quite something when you make samosas and chai in your kitchen. Now that we have reminders to stay safe, slow down, rethink our actions and use the opportunity to bring the best out in ourselves, what better way than to create some of those moments in the kitchen? If you are someone after my heart, you will know what I mean.
To create is to find a voice and communicate – ideas and emotions. This winter, I did a lot of it. And, I cannot be more grateful.
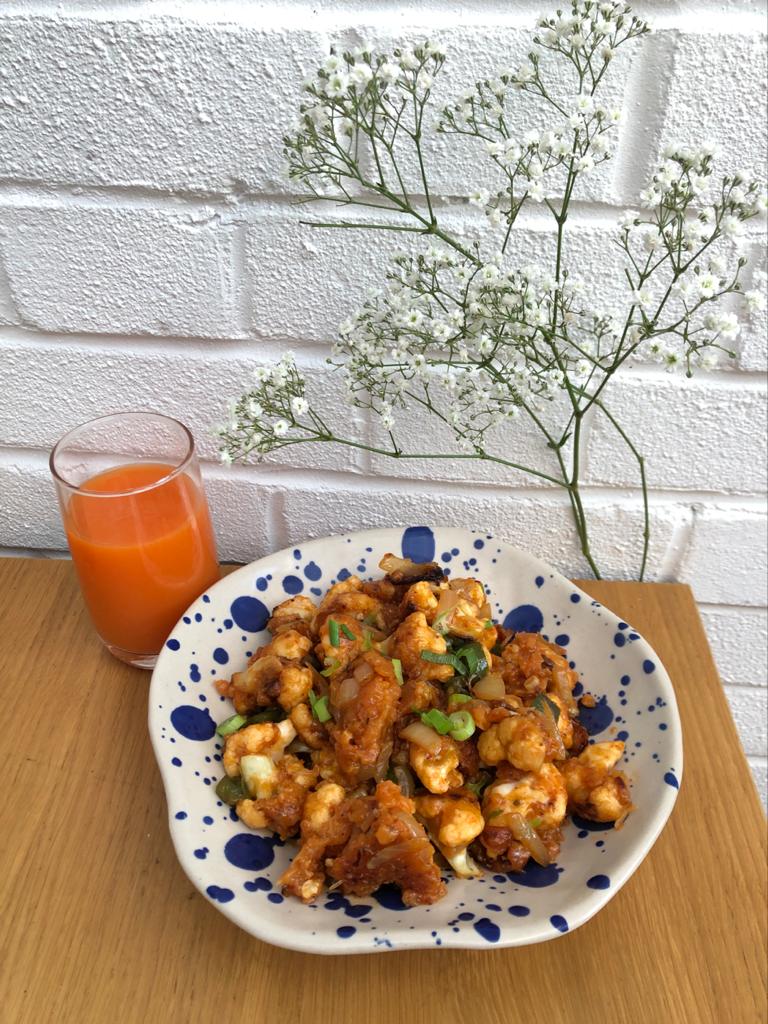
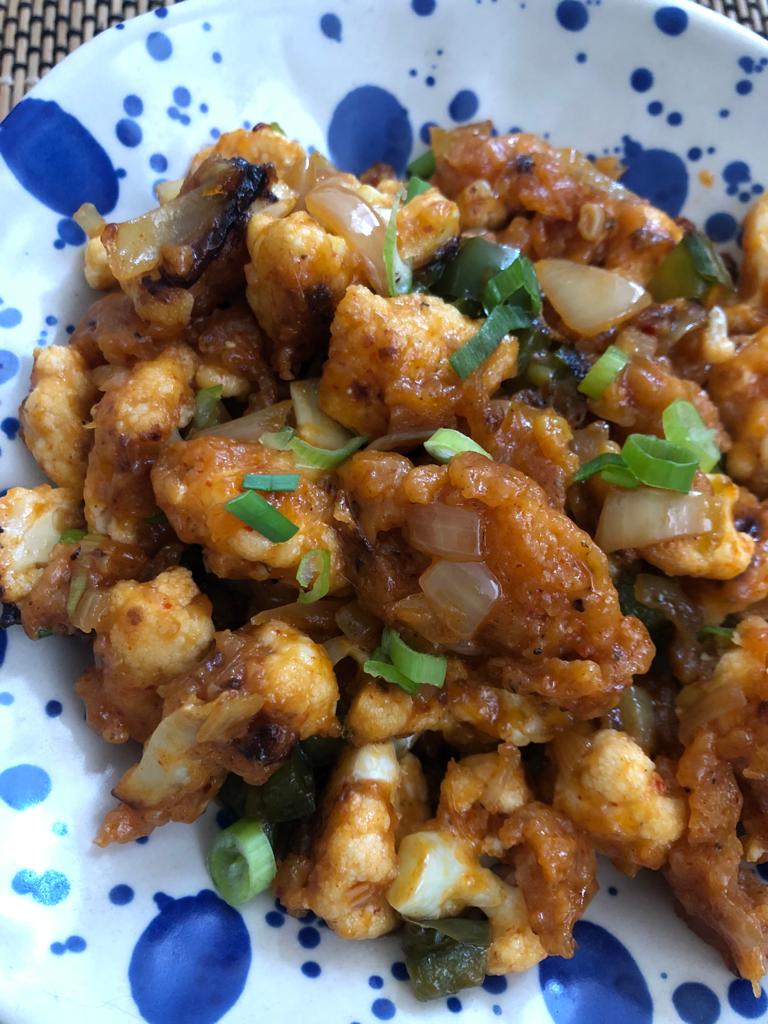
There was a gobi stall right across my university campus that sold gobi with fried rice. I tasted it after 3 years at Uni and maybe once after that. That is how sad I was with street food. I had an incredibly poor immunity especially to unfiltered water matched by an equally poor zest for street food. I started enjoying street food with my cousins in Blore eventually and then the joy of international street food with K happened. Anyway back to this gobi stall across campus – it was so splendid and I sometimes think of it and wish I had access to something like that here in Surrey. A couple of days back, we decided to quit wishing and decided to act on it. K was my sous chef. We did a mish mash of recipes and followed our heart. It was incredible fun cooking and listening to endless Coke Studio as we excitedly churned up some gobi Manchurian for lunch as Mili wondered what possessed us. Some times, I remember how it felt making the dish more than how I felt eating it. One of the several joys of cooking, I suppose.
If you’d like to know, here is how we made it. 1. Make small cauliflower florets from 1 medium cauliflower. We want a size that allows for it to be coated well in all that saucey goodness and have a bit of crunch around without being raw inside, without using copious amounts of oil. 2. Create a thin batter of cornflour (2 tbsp), plain flour (1 heaped tbsp), chilli powder (1-2 tsp), turmeric (1 tsp), salt, ginger garlic paste (1 tsp) and vinegar (1 tsp). 3. Add the cauliflower florets to this and set aside for 30 mins. 4. Meanwhile, dice 1 onion and 1 bell pepper. Also, chop garlic (we did about 8 cloves) and ginger (1/2 inch) and green chillies and spring onions. 5. Heat 2 tbsp of oil in a wok, add some of chopped garlic and ginger from step 4 and saute for 30 seconds. Add the cauliflower to the wok, taking care they are spread out and not a heap. This ensures uniform cooking – if your wok is small, do it in 2 batches. The cauliflower will turn turn golden and crispy in some parts and the batter becomes crunchy like the outside of fritters. Set all this fried goodness aside. 6. Now heat a couple tbsp of oil in the same wok, add the remaining ginger garlic and sauté for 30 seconds. Add bell pepper, onions, chillies and sauté for 2 mins so the veggies retain some crunch. 7. Add 2 tbsp sriracha sauce/chilli sauce, 3-4 tbsp soy sauce, a pinch of sugar and mix. Add 1 cup water and bring to boil. 8. Mix 2 tsp cornstarch and 2 tbsp water and make a thin paste. Add this to boiling sauce and let it thicken. Mix the cauli and garnish with spring onions.
That’s it really. The gobi had a slight crunch and the sauce was perfect. I loved that there were crispy bits to it and some chunks of cooked crispy cornflour with garlicky goodness. It feels like a lot of steps but I think when you make something for the first time, chances are it may feel that way. Also, this does have a few steps. But it is so worth it. I would still go back and eat gobi from that stall across campus anyway but I know that there is something that gives me as much joy, although a different kind, when I make it in my kitchen with my K as Mili hopefully waits for a piece to land in her bowl.